Should You Caulk Between Baseboard and Vinyl Flooring?
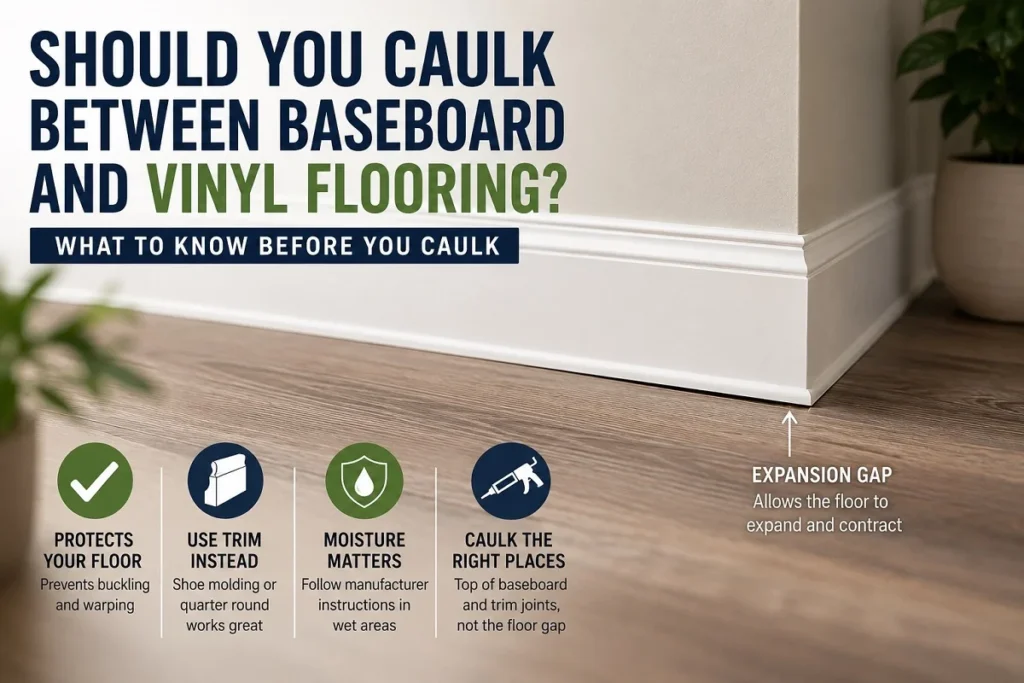
Usually, you should not caulk a required expansion gap around a floating vinyl floor. That space is part of the flooring installation and should remain available unless the manufacturer specifically allows a flexible seal in that location.
The important part is identifying what you are actually seeing. A narrow line below the baseboard may be a cosmetic trim gap, the flooring’s perimeter clearance, or a larger installation problem. Those three situations should not be fixed in the same way.
If the edge simply looks unfinished, baseboard, shoe molding, or quarter round may be a better solution than filling the opening. If the gap is unusually large, uneven, or changing over time, find the cause before covering it.
| What You See | Best First Move |
|---|---|
| Required gap around a floating floor | Keep the required clearance and use trim to conceal it |
| Small line beneath the baseboard | Identify whether it is cosmetic before sealing it |
| Large or uneven opening | Check the trim and floor instead of hiding it with thick caulk |
| Wet-area perimeter | Follow the exact flooring manufacturer’s sealing instructions |
Table of Contents
- 1. Check Whether the Vinyl Floor Is Floating or Glue-Down
- 2. Do Not Treat the Perimeter Clearance as a Defect
- 3. Decide Whether the Gap Is in the Flooring or Under the Trim
- 4. Use Baseboard or Shoe Molding to Hide an Exposed Edge
- 5. Know Where Caulk Makes More Sense on a Baseboard
- 6. Follow Separate Instructions for Bathrooms and Other Wet Areas
- 7. Do Not Hide a Large or Uneven Gap With a Thick Bead
- 8. A Gap That Is Changing Needs Investigation, Not Cosmetic Repair
- 9. If Sealing Is Allowed, Use the Exact Product Instructions
- 10. Use This Final Check Before Picking Up the Caulk Gun
- Questions Homeowners Ask About Baseboards and Vinyl Floors
- So, Should You Caulk Between Baseboard and Vinyl Flooring?
1. Check Whether the Vinyl Floor Is Floating or Glue-Down
Your first job is to identify how the flooring was installed.
Floating vinyl planks, including many click-lock products, connect to each other without being glued across the entire subfloor. These installations commonly need perimeter space around walls and other fixed objects.
Glue-down vinyl works differently, so advice written for a floating floor should not automatically be applied to it.
If you still have the flooring box or product paperwork, look up the exact installation guide. The manufacturer’s requirements should decide how the perimeter is treated.
Check the required perimeter clearance before adding caulk or fastening trim.
Check the instructions for that product rather than assuming floating-floor rules apply.
2. Do Not Treat the Perimeter Clearance as a Defect
A visible space at the edge of a floating vinyl floor does not necessarily mean the installer cut the flooring too short.
Shaw advises installers to leave proper expansion space around the room perimeter and fixed objects, with the amount depending on the type of luxury vinyl being installed. It also lists baseboards and quarter round among the finishing accessories used after installation. :contentReference[oaicite:0]{index=0}
This is why one universal gap measurement should not be copied from a random article and applied to every vinyl product. Check the instructions supplied with your flooring before deciding that the space needs filling.
A neat-looking edge is not worth changing a clearance that the flooring manufacturer requires.
3. Decide Whether the Gap Is in the Flooring or Under the Trim
Two gaps that look similar from standing height can have different causes.
The flooring’s perimeter gap sits between the plank edge and the wall or another fixed surface. A separate narrow line can appear between the bottom of the baseboard and the finished floor if the trim does not sit evenly.
Look closely before applying anything. If you can see deep into the flooring perimeter, you may be looking at the installation clearance. If the baseboard simply leaves a thin, uneven shadow along the floor, the trim itself may need attention.
Space between the plank edge and a fixed surface. Check the installation requirements.
A small line below the baseboard caused by trim height or an uneven floor surface.
4. Use Baseboard or Shoe Molding to Hide an Exposed Edge
If the problem is mainly appearance, trim can often solve it without filling the flooring perimeter.
Baseboard may already provide enough coverage. If it does not, shoe molding or quarter round can extend farther over the edge and create a cleaner transition between the wall and floor.
NovaFloor specifically warns against pinching floating vinyl with tight molding. Its technical guidance says quarter round should be fastened into the baseboard rather than through the flooring, because fastening through the floor can restrict movement. :contentReference[oaicite:1]{index=1}
That installation detail matters more than the name of the molding you choose.
For a cleaner perimeter
5. Know Where Caulk Makes More Sense on a Baseboard
Caulk is useful around baseboards, but the floor edge is not automatically the right place for it.
A common finish detail is the stationary seam where painted baseboard meets the wall. Small joints between fixed pieces of painted trim may also be sealed when the material and finish allow it.
Those locations are different from the lower edge beside a floating floor. One is a stationary trim joint. The other may be part of a flooring system that needs to remain independent of the wall trim.
A small stationary seam between painted baseboard and the wall.
That the entire lower edge of a floating vinyl floor should be sealed to the trim.
6. Follow Separate Instructions for Bathrooms and Other Wet Areas
A waterproof vinyl product does not mean every perimeter detail can be sealed however you like.
Wet-area installation requirements can differ by product. Some instructions may call for particular sealing methods in certain locations, while standard room-perimeter guidance may be different.
NovaFloor, for example, notes that there are situations around fixed areas where molding cannot be installed and a compatible silicone treatment may be specified, while still telling owners to check the instructions for the particular product. :contentReference[oaicite:2]{index=2}
For bathrooms, laundry rooms, and similar areas, follow that product-specific detail instead of assuming that more caulk always means better moisture protection.
💧 Check before sealing
Use the wet-area instructions for your exact flooring product rather than treating perimeter caulk as a universal waterproofing method.
7. Do Not Hide a Large or Uneven Gap With a Thick Bead
If the opening under the baseboard is wide enough to catch your eye from across the room, inspect the cause before filling it.
The baseboard may have been installed too high. The flooring or subfloor may be uneven. The trim may not provide enough coverage, or one section of baseboard may simply be poorly fitted.
A thick bead of caulk can look bulky and may still leave the underlying problem untouched. Resetting the trim or adding suitable molding can produce a cleaner result when the issue is coverage rather than sealing.
8. A Gap That Is Changing Needs Investigation, Not Cosmetic Repair
A gap that has stayed the same since installation is different from one that is becoming wider.
If the flooring starts separating, lifting, pressing against fixed surfaces, or changing noticeably at the perimeter, do not make caulk the first repair. Those symptoms can point to an installation or flooring issue that deserves inspection.
The same applies if new gaps appear after the room has been finished. Covering the symptom may make it harder to see what is happening.
If you cannot identify the cause, a flooring installer can inspect the floor and trim before you alter the perimeter.
A widening gap, lifting plank, or new separation is a reason to diagnose the floor before making the edge look better.
9. If Sealing Is Allowed, Use the Exact Product Instructions
Some flooring details may allow or require a compatible flexible sealant. If your manufacturer’s instructions call for one, follow the specified product type, location, application method, and curing directions.
Do not assume every silicone, acrylic, or polyurethane product is suitable simply because it is sold as caulk. Compatibility with the flooring, trim, moisture conditions, and finish matters.
Keep the application controlled. Caulk should not be used as a substitute for missing trim, a badly fitted baseboard, or a large construction gap.
Confirm that sealing is allowed at that exact location.
Use a sealant that is compatible with the flooring and trim.
Follow the sealant manufacturer’s curing and cleaning instructions.
10. Use This Final Check Before Picking Up the Caulk Gun
You should now be able to make the decision without guessing.
Check these five things
Identify whether the floor is floating or glue-down.
Find the installation guide for the exact flooring product.
Work out whether you are seeing the flooring perimeter or a trim-fit problem.
Use baseboard, shoe molding, or quarter round where trim coverage is the real issue.
Only use sealant where the flooring instructions and construction detail allow it.
Questions Homeowners Ask About Baseboards and Vinyl Floors
Should baseboards touch vinyl plank flooring?
The baseboard should cover the perimeter neatly without being installed in a way that restricts a floating floor. The exact clearance and trim requirements depend on the flooring product.
Can you caulk around floating vinyl plank flooring?
Do not automatically fill the perimeter of a floating vinyl floor. Check the manufacturer’s installation instructions first. Some specific details may permit a flexible seal, while the normal expansion space may need to remain free.
Should quarter round be attached to vinyl flooring?
For a floating installation, quarter round should not be fastened through the flooring. NovaFloor specifically recommends fastening it into the baseboard so the flooring is not pinned in place. :contentReference[oaicite:3]{index=3}
What should I do if the gap under the baseboard is too large?
Inspect the trim and floor before filling the opening. The baseboard may be too high, the surface may be uneven, or the existing trim may not provide enough coverage. Resetting the trim or adding shoe molding can be cleaner than a thick caulk bead.
So, Should You Caulk Between Baseboard and Vinyl Flooring?
Do not automatically caulk the lower edge of a floating vinyl floor. First identify the flooring type and determine whether the opening is a required perimeter space, a cosmetic trim gap, or a larger fit problem.
If the flooring needs perimeter clearance, keep that requirement intact and use suitable trim to conceal the edge. If your exact installation instructions allow or require sealant in a particular location, follow those instructions and use a compatible product. That gives you a cleaner finish without solving one visual problem by creating a flooring problem.