
20 Spooky Halloween Wall Decor Ideas That’ll Steal the Spotlight from Any Costume
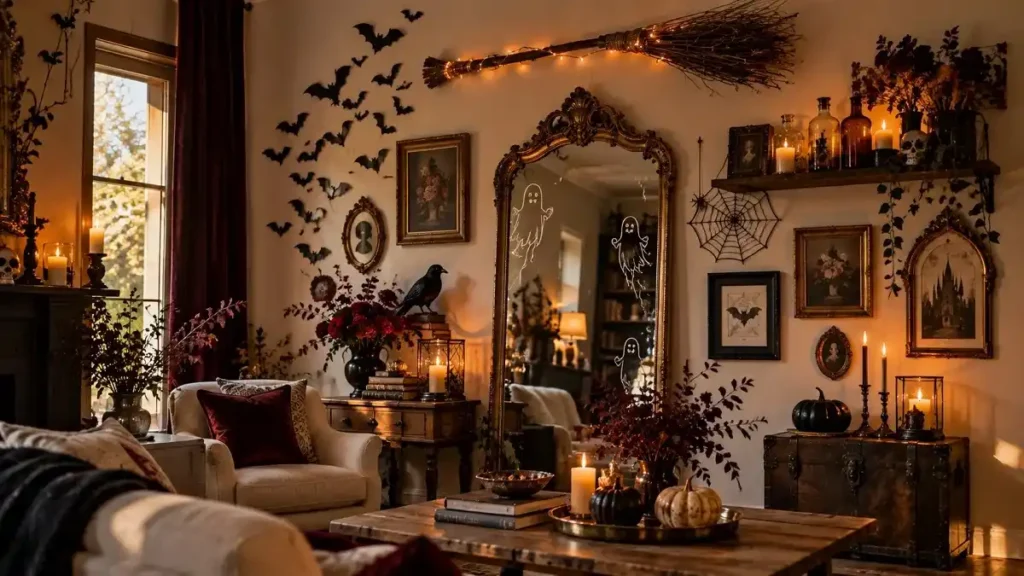
Halloween decorating can get crowded fast. A few pumpkins become a mantel full of props, fake cobwebs spread across the room, and before long the decorations are competing with the home itself.
Your walls give you another option. Paper bats, ghost drawings on a mirror, vintage frames, and simple lighted displays can add plenty of Halloween character without filling the room with more stuff.
These 20 Halloween wall decor ideas range from quick, low-cost projects to larger feature-wall displays. There are options for living rooms, entryways, bedrooms, and party spaces, including several that can be removed or packed away once Halloween is over.
20 DIY Halloween Wall Decor Ideas for Your Home
The best Halloween wall decor does more than fill an empty space. It should fit the room, be practical to put up, and be easy to remove or store when the season ends.
You also don’t need to use all 20 ideas at once. Start with one larger feature, such as a decorated mirror, broomstick, or gallery wall. Then add one or two smaller details, such as paper bats, candles, or framed art. This keeps the room festive without making it feel crowded.
If you rent or want to protect painted walls, test tape and removable adhesive in a hidden spot first. Check the product directions too, since some adhesives are not made for wallpaper, rough surfaces, fresh paint, or weak paint.
Quick Halloween Wall Decor Cheat Sheet
Short on time? Use this quick guide to compare a few of the easiest projects by cost, setup time, and how easy they are to remove. Prices are only estimates and will depend on the supplies you already have.
| Decor Idea | Approx. Cost | Approx. Time | Renter Friendly? |
|---|---|---|---|
| Chalk-Marker Mirror Ghost Art | Under $5 | 10 mins | Yes, on suitable glass |
| Floating Flying Broomstick | $10–$15 | 20 mins | Usually, with suitable hooks |
| Concentrated Bat Swarm Archway | $5–$10 | 25 mins | Usually, with wall-safe tape |
| Dark Academia Book Page Wall | $3–$8 | 30 mins | Usually |
| Washi Tape Geometric Spiderweb | Under $5 | 15 mins | Usually; test tape first |
| Dripping Wax Wall Sconces | $12–$20 | 35 mins | Depends on mounting |
1. Chalk-Marker Mirror Ghost Art
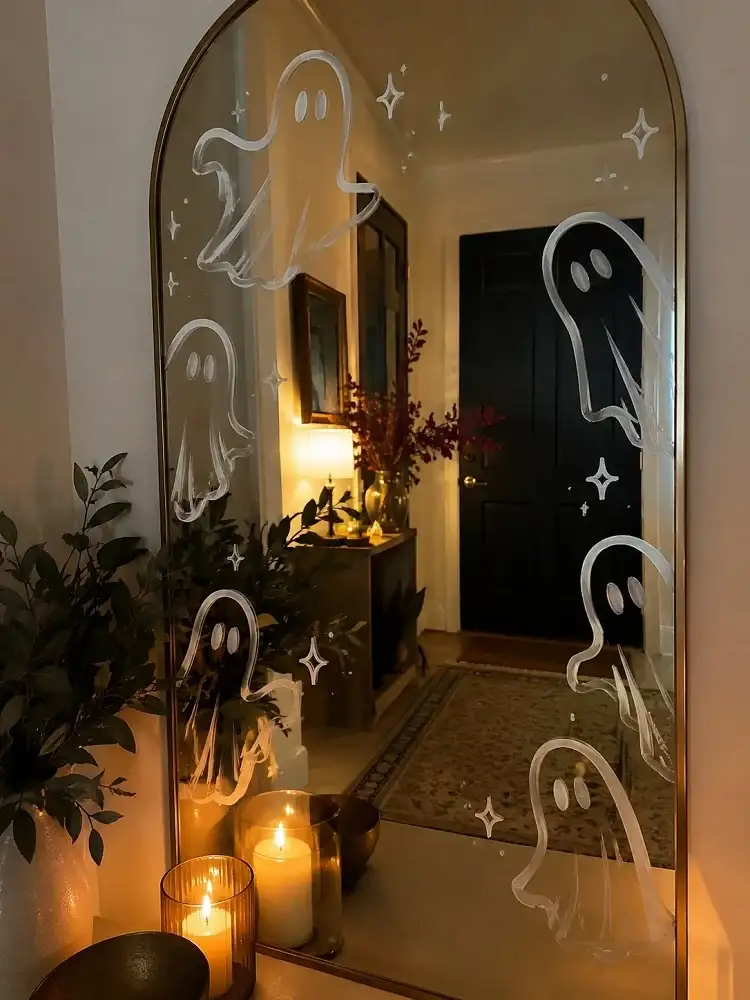
Instead of covering an entryway or bathroom mirror with a heavy garland, use the glass as part of the decoration. Draw a few simple ghost shapes with a white liquid chalk marker. Try different sizes so the design feels loose rather than too perfect.
Keep the center of the mirror fairly clear if you still want to use it each day. A few ghosts around the corners or edges can make a bigger impact than covering the whole surface.
2. Floating Flying Broomstick with Warm Lights
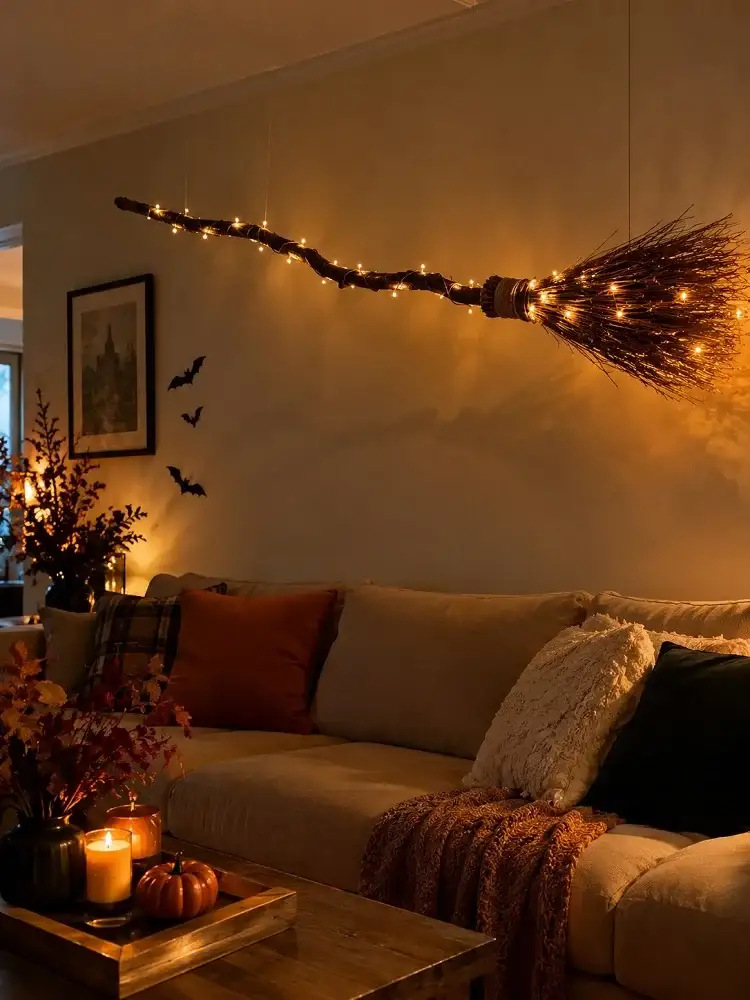
A rustic broomstick can become a simple wall feature when it is hung across an open section of the room. A natural wood broom works especially well because its rough texture already fits the season.
Use clear fishing line and hooks rated to hold more than the weight of the broom. Attach the line at two points so the broom stays level instead of tipping to one side. Avoid hanging it over a bed, sofa, or another place where someone may sit or sleep.
Wrap a thin strand of battery-powered fairy lights around the handle. Keep the battery pack close to the bristles or another hidden spot where you can still reach the switch.
3. Concentrated Bat Swarm Archway
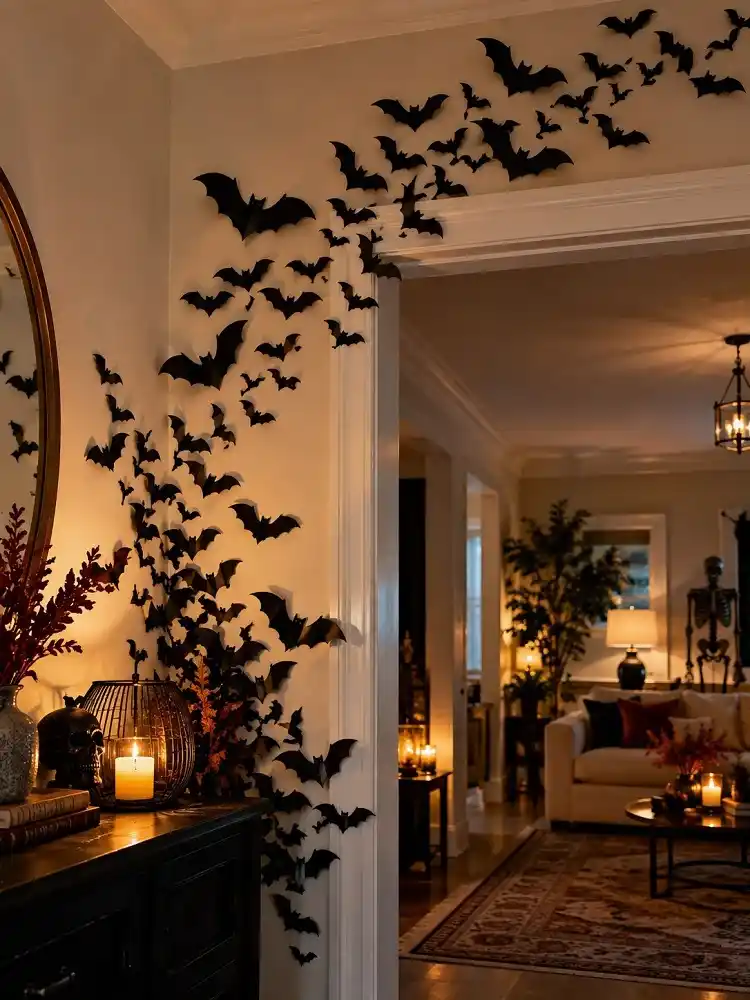
Paper bats are a Halloween favorite, but spreading them evenly across a large wall can make the display feel flat. A tighter group creates a clearer shape and makes the bats look as if they are moving together.
Start near the lower corner of a doorframe or mantel. Place the bats close together at first, then slowly spread them out as the group moves toward the ceiling. A loose S- or Z-shaped path works well.
Fold each bat slightly through the middle so the wings lift away from the wall. Use small pieces of removable tape, but test the tape on a hidden area first.
4. DIY Haunted Frame Overlay for Smart TV
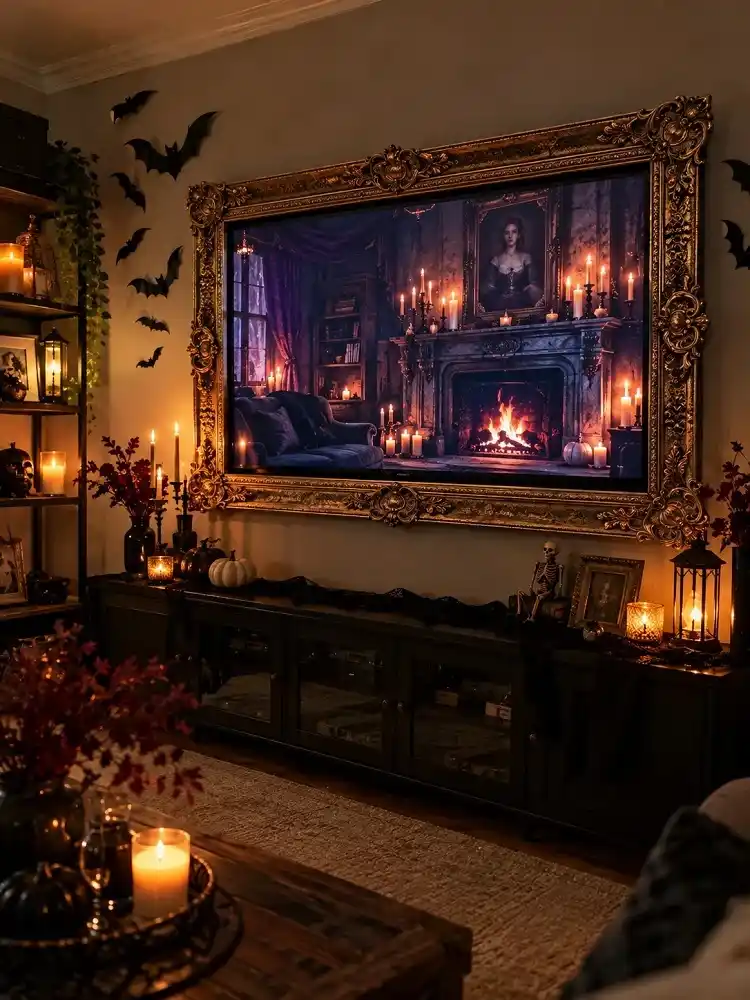
A large wall-mounted TV can look out of place beside older Halloween decorations. A lightweight frame around the screen can help it blend into the room.
Cut the frame from lightweight foam board and paint it with layers of brown, black, and dull gold for an aged finish. Measure the opening carefully so the frame stays clear of the screen, sensors, speakers, and air vents.
Once the frame is in place, play a slow fireplace, old portrait, or other Halloween background video. Keep the sound low or muted if you only want the screen to act as part of the room decor.
5. Wax-Sealed Vintage Envelope Grid
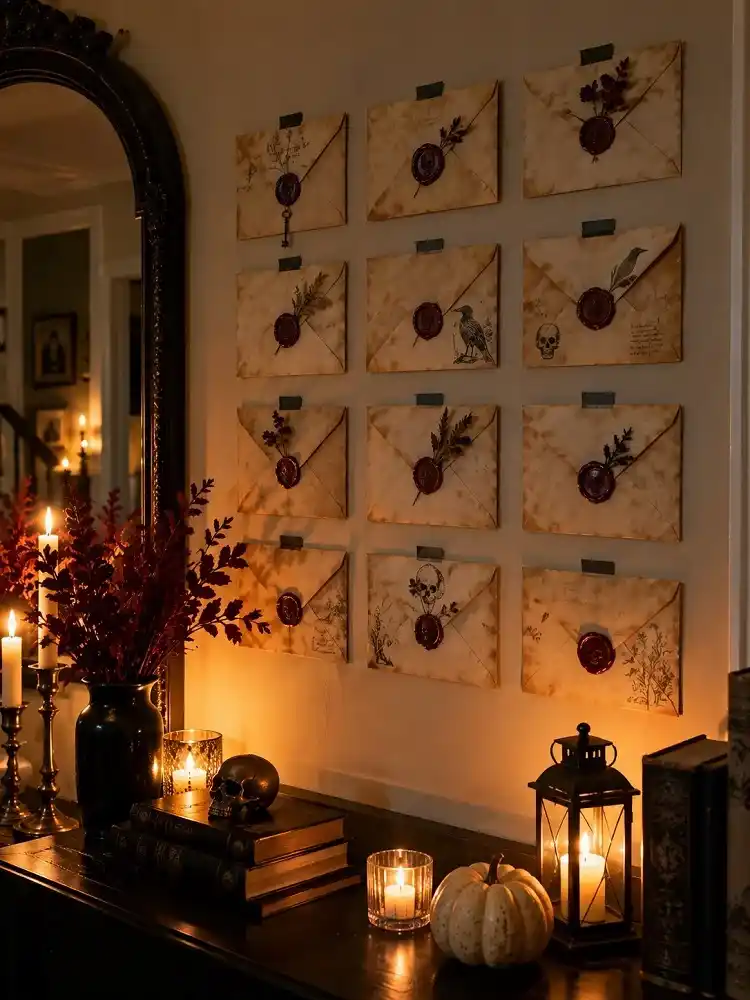
A neat grid of old-looking envelopes works well in a hallway, office, or reading corner. The straight layout keeps the display tidy, while the aged paper gives it a darker Halloween feel.
Start with plain paper envelopes. Lightly stain them with tea if you want an aged look, then let them dry fully on a flat surface. Add a dark red wax seal or a simple stamped mark to each envelope.
Lay the envelopes on the floor first and test the spacing before putting them on the wall. A 3-by-4 grid gives you 12 pieces and creates a clear feature without covering the whole wall.
6. Dark Academia Book Page & Pressed Moth Wall
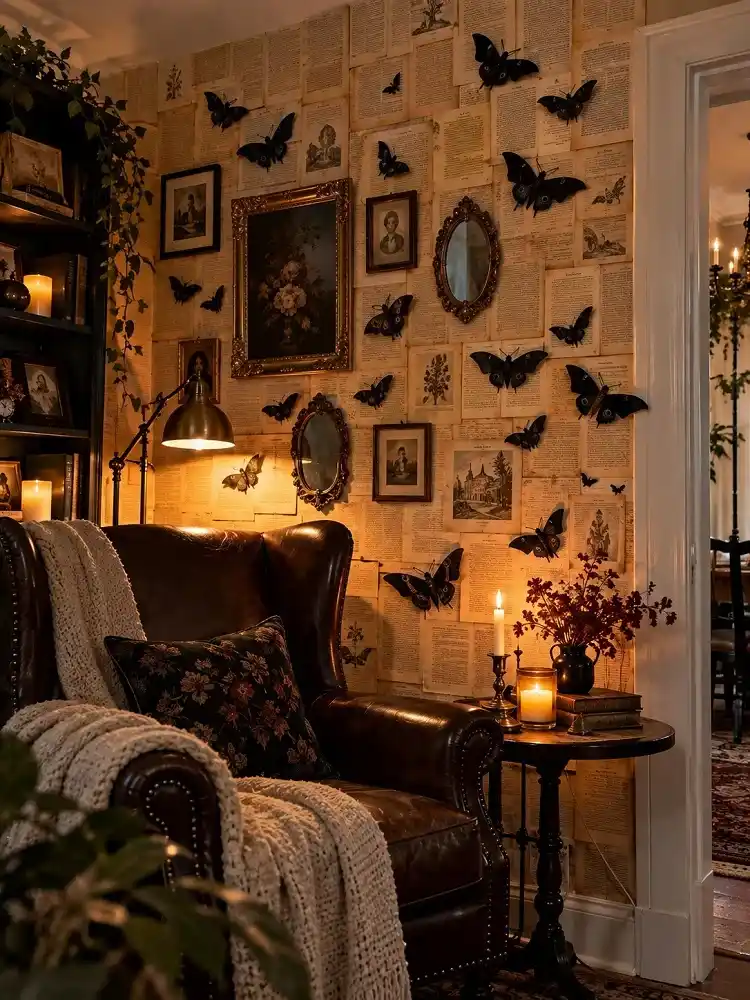
If you have a damaged book that cannot be reused or donated, its pages can become a textured backdrop for a reading corner. Avoid cutting up valuable or usable books just for this project.
Arrange the pages in loose rows and overlap some edges so the display does not look too rigid. Add black cardstock moths over the paper and fold their wings slightly so they stand away from the wall.
This idea works well behind a chair, small desk, or bookshelf because it adds plenty of detail without taking up floor space.
7. Gothic Botanical Wall (Dried Roses & Raven)
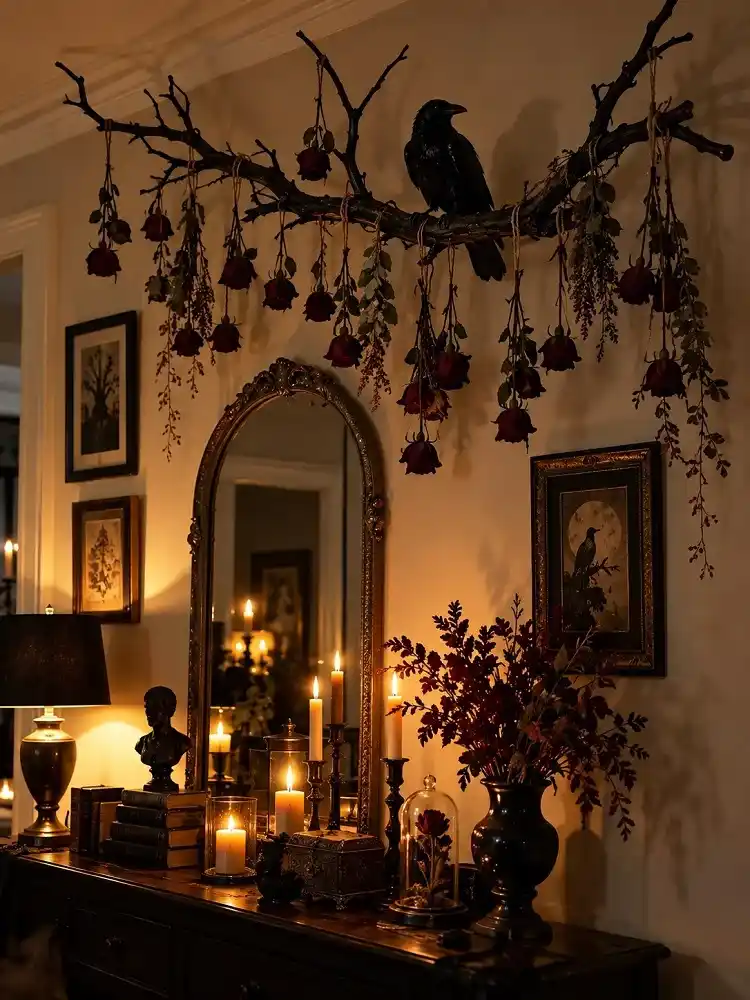
Dried flowers and branches can bring Halloween color into a room without using plastic cobwebs or bright orange decorations. Start with a dry branch that is light enough to mount safely.
Paint the branch matte black if you want a darker finish. Tie dried burgundy or red roses along it with thin floral wire or dark thread. Place the flowers at different heights so they fall naturally rather than forming a straight row.
Add one lightweight black raven near the center or one end of the branch. Make sure the wall supports can handle the full weight, and keep dried flowers away from real flames.
8. Apothecary Floating Shelf Display
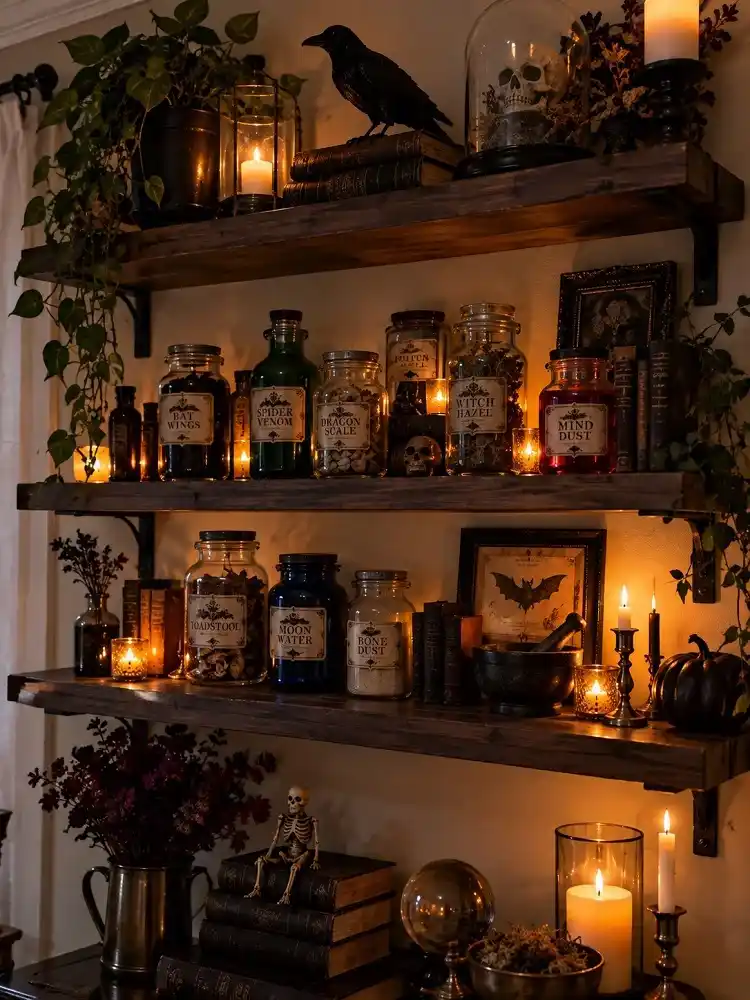
If you already have open wall shelves, turn them into a small Halloween apothecary without changing the shelves themselves. Save a few empty glass jars and bottles, wash them well, and remove the old labels.
Add simple vintage-style labels with playful names such as “Bat Wings” or “Spider Venom.” You can fill a few sealed jars with dark-colored water and leave others empty.
Mix different bottle heights with a few old books or dried stems so the shelf does not look like a row of matching containers. Small battery-powered lights behind the glass can add a soft glow without using an open flame.
9. DIY Gothic Window Arch Silhouette
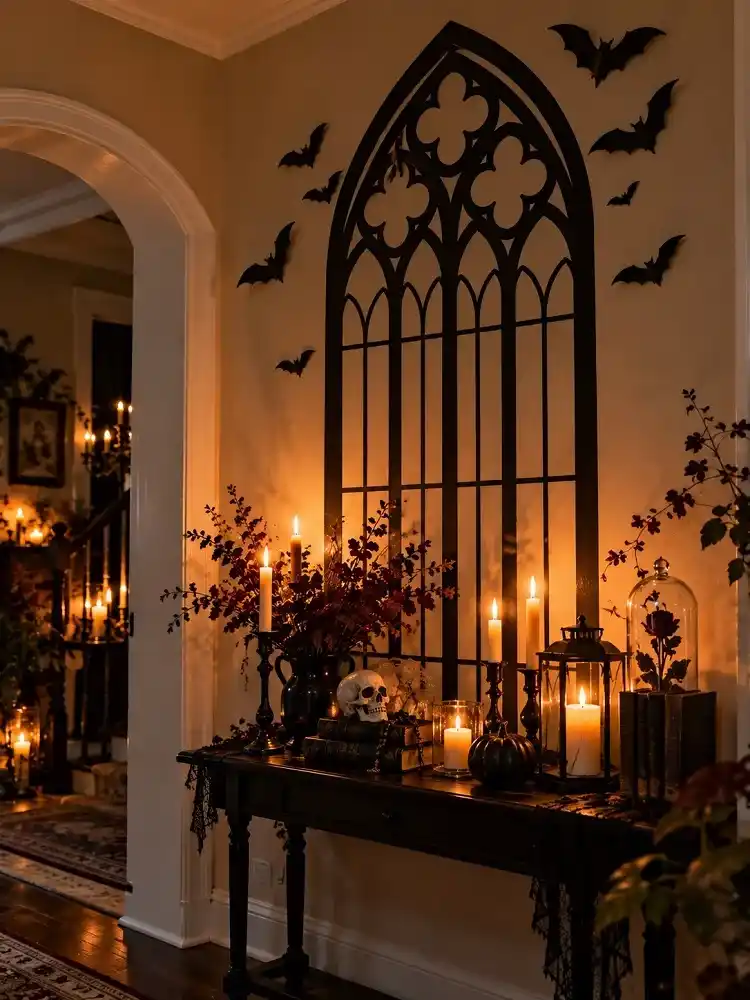
You can give a plain wall the shape of an old arched window without adding a heavy prop. Removable black adhesive material or suitable wall-safe tape can create the outline.
Sketch the shape on paper first. Make one tall center arch, then add a few straight lines inside it to suggest window panes. Keeping the design simple makes it easier to cut and place.
Add a few paper bats near the upper edge if the wall still feels empty. Test any adhesive in a hidden spot before covering a larger area.
10. Hanging Skeleton Hand Burlap Photo Line
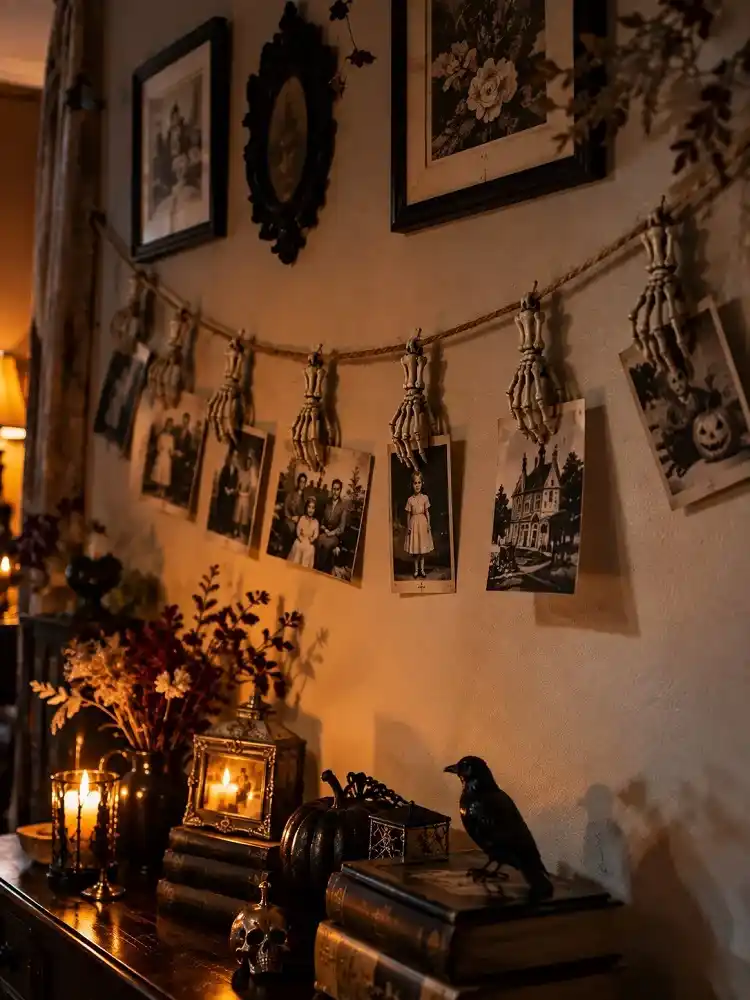
This project mixes old photos with a small Halloween detail. Stretch a piece of burlap twine across an accent wall and leave a little slack in the center instead of pulling it completely straight.
Attach black-and-white photo copies or vintage postcards with wooden clothespins. Small plastic skeleton hands can be clipped or tied near the photos so they look as if they are holding them.
11. Paper Plate & Lace Spiderweb Art
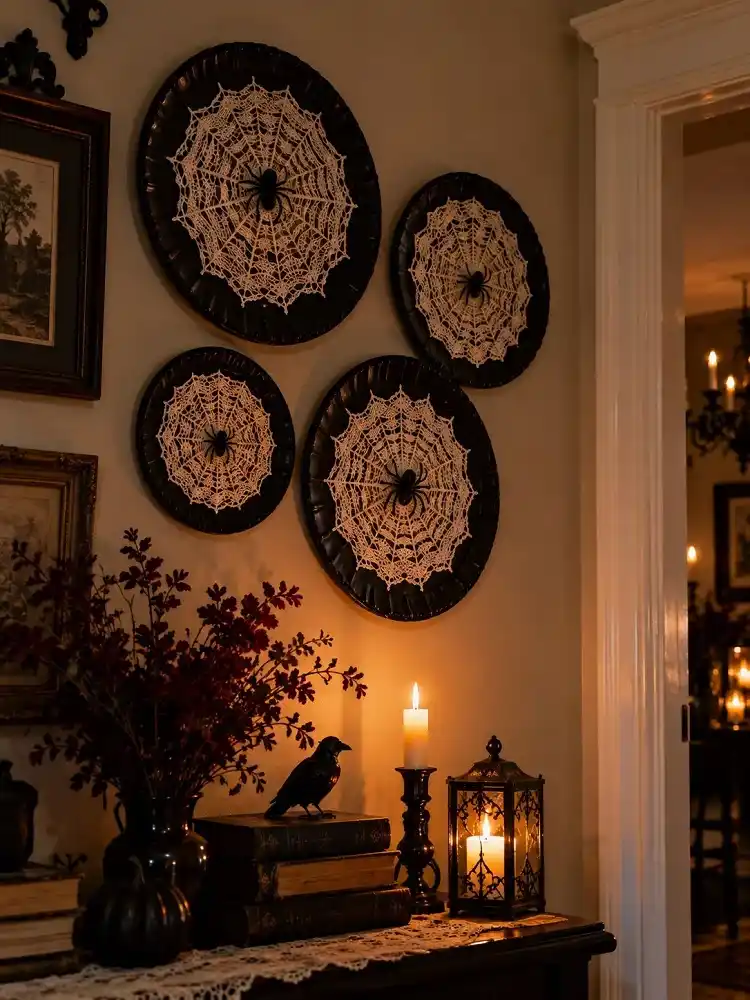
Stretchy fake cobwebs can be messy to handle and store. Black paper plates and lace doilies offer a cleaner way to bring a web pattern to the wall.
How to Make It
- Cut the center circle from a black paper plate.
- Glue a round white or cream lace doily across the opening.
- Add a small lightweight spider near the center.
- Let the glue dry fully before hanging the finished piece.
Make three or four and group them together instead of spreading them across the whole room. Mixing two plate sizes can make the arrangement feel less uniform.
12. Glowing Silhouette Picture Frames
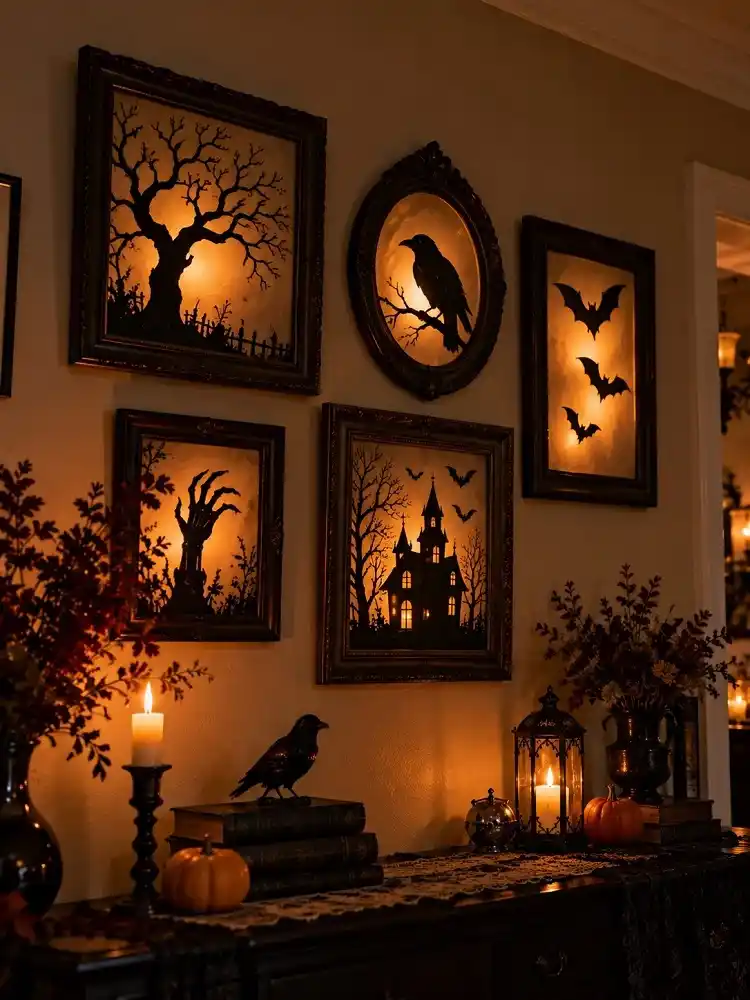
You don’t have to replace your everyday frames for Halloween. A few temporary paper inserts can turn them into a small lighted gallery.
Cut simple shapes from black cardstock, such as a bare tree, raven, bats, or an old house. Place each cutout against a pale background inside the frame.
If you want the frame to glow, use a low-heat battery-powered LED that is suitable for the space available. Keep the light and any vents clear, and follow the light maker’s directions.
13. Accordion Fold Paper Ghost Garland Cascade
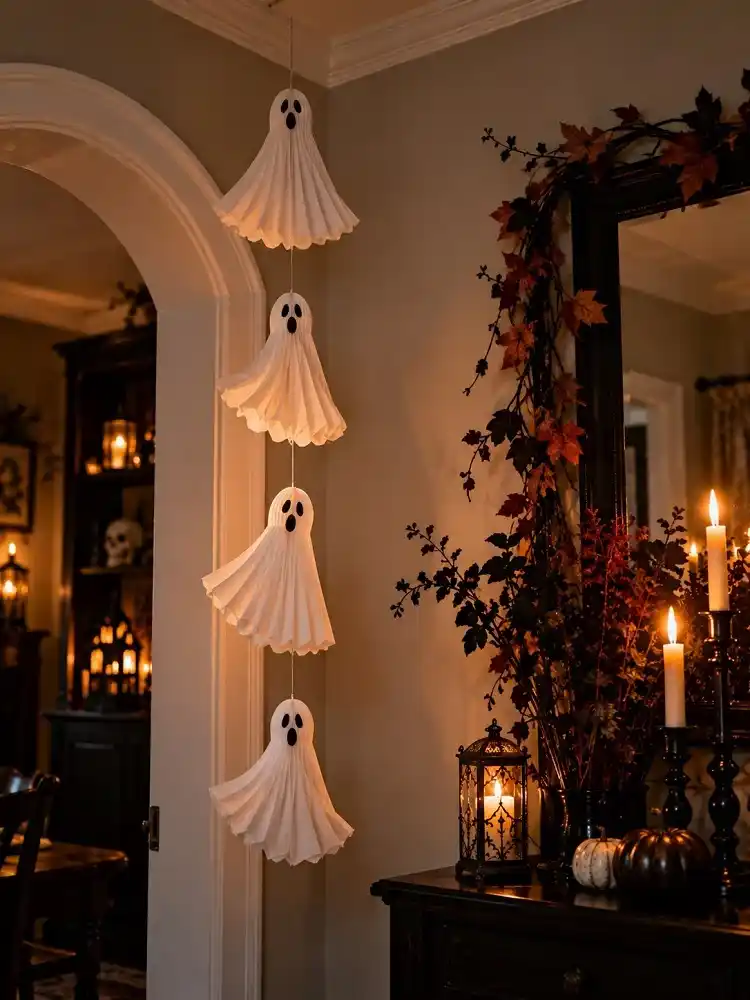
A tall wall or empty corner gives you room to decorate upward instead of filling more floor space. Basic white paper is enough for this project.
Fold a sheet back and forth like a paper fan. Shape the top into a simple ghost head, then open the folds slightly so the body has some depth. Add a simple face with a black marker.
Make three or four ghosts and hang them at different heights with clear thread. Keep them away from ceiling fans, light fixtures, candles, and other heat sources.
14. Thrifted 3D Lenticular Morphing Gallery
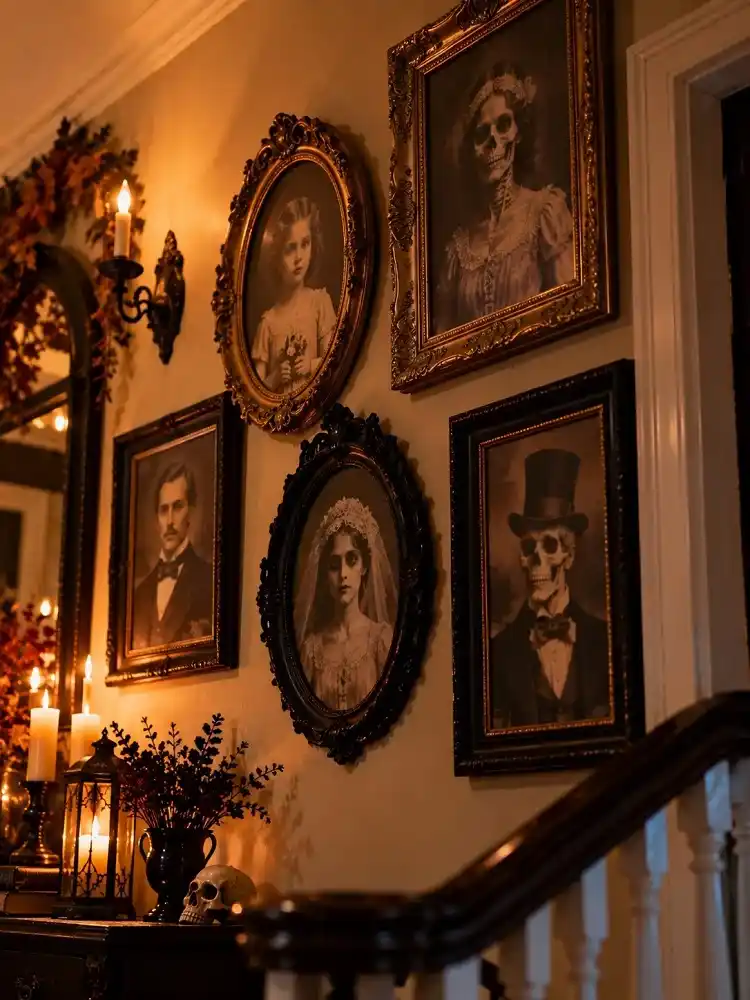
Lenticular pictures change as you view them from different angles, which makes them a fun choice for a hallway or stair wall. Halloween versions often shift between an old portrait and a ghostly face.
Place three or four prints in mismatched thrift-store frames. Dark wood, aged gold, and worn black finishes can work together even when the frames do not match.
Hang the pictures where people will naturally walk past them. The changing image works best when it can be seen from more than one angle.
15. Black Washi Tape Geometric Spiderweb Corner
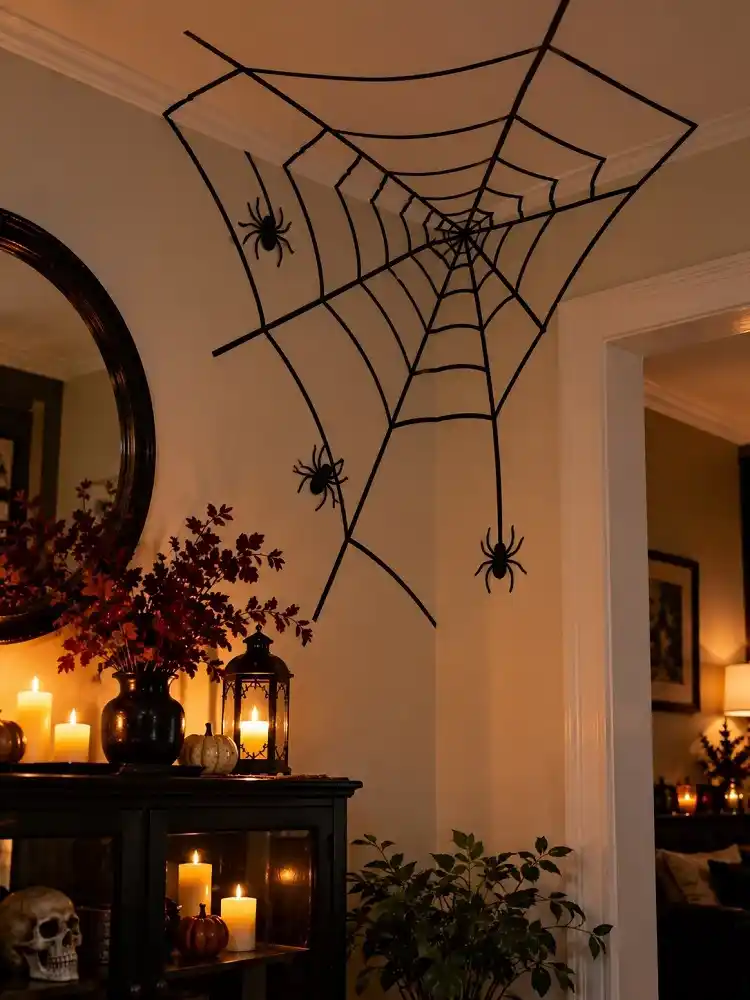
An empty corner where two walls meet the ceiling is an easy place to build a large spiderweb without adding another object to the room.
Start with several long strips of black washi tape running out from one point. Add shorter angled sections between those lines to form the web. Step back every few strips to check the shape before adding more.
Don’t worry about making every section perfectly even. A little variation can make the web feel more natural. Test the tape first, since removable tape may behave differently on old, weak, fresh, or textured paint.
16. Moody Gothic Fern & Skull Gallery
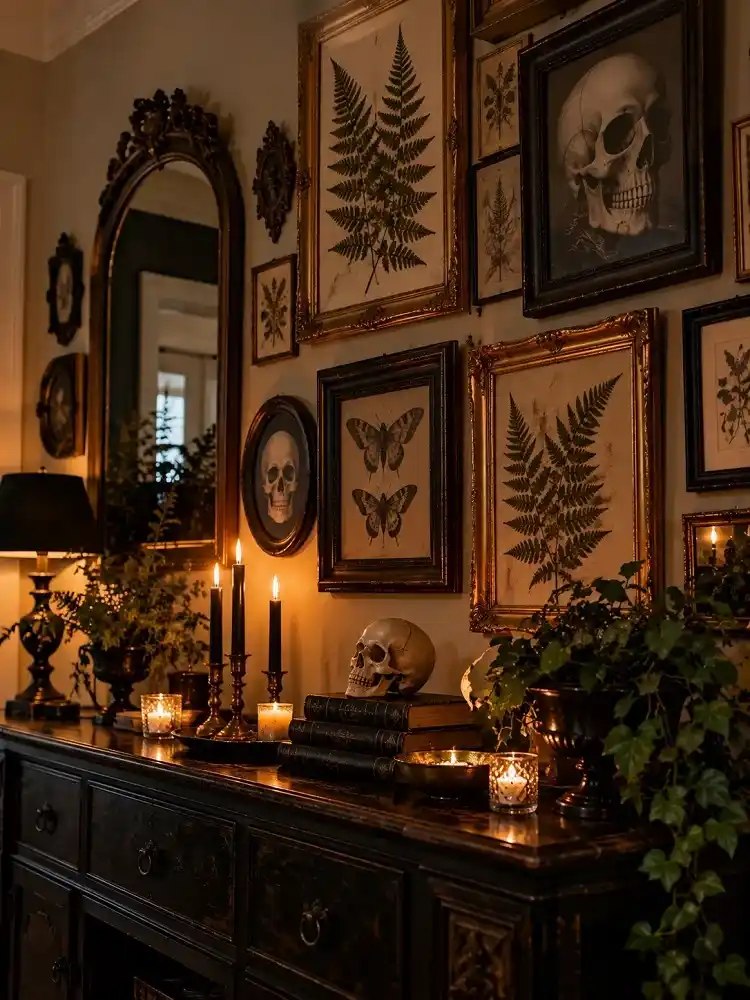
Halloween decor does not have to depend on orange and black. Dark green leaves, aged gold frames, and simple black-and-white art can give a gallery wall a seasonal look that still works with everyday decor.
Choose clean fern leaves and place them between sheets of absorbent paper inside a heavy book or plant press. Keep them in a warm, dry place until they are fully dry. Depending on the method and the leaves, this can take longer than a few days.
Pair the pressed leaves with simple skull sketches, moth prints, or other nature artwork. Mix frame sizes, but repeat one or two finishes, such as black and aged gold, to help the group feel connected.
17. Dripping Wax Wall Sconces
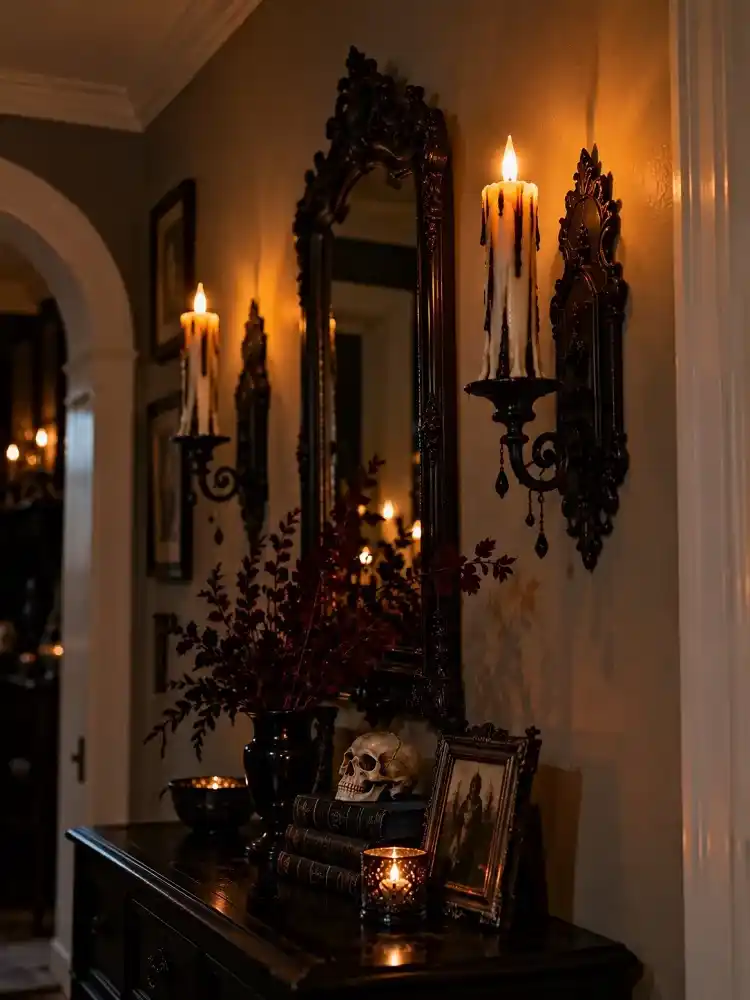
Wall sconces can add Halloween lighting without using real candle flames. Start with lightweight brackets or sconces and battery-powered LED taper candles.
For a melted-wax look, use a craft material that is safe for the candle casing and follow its directions. If you add raised drips, keep the switch, battery area, and any openings clear.
Once the added material is fully set, paint the drips black or off-white. Stick with battery-powered candles for this project, especially when the sconces are close to walls, paper, fabric, or dried plants.
18. Pastel Goth Pink & Black Ghost Canvas
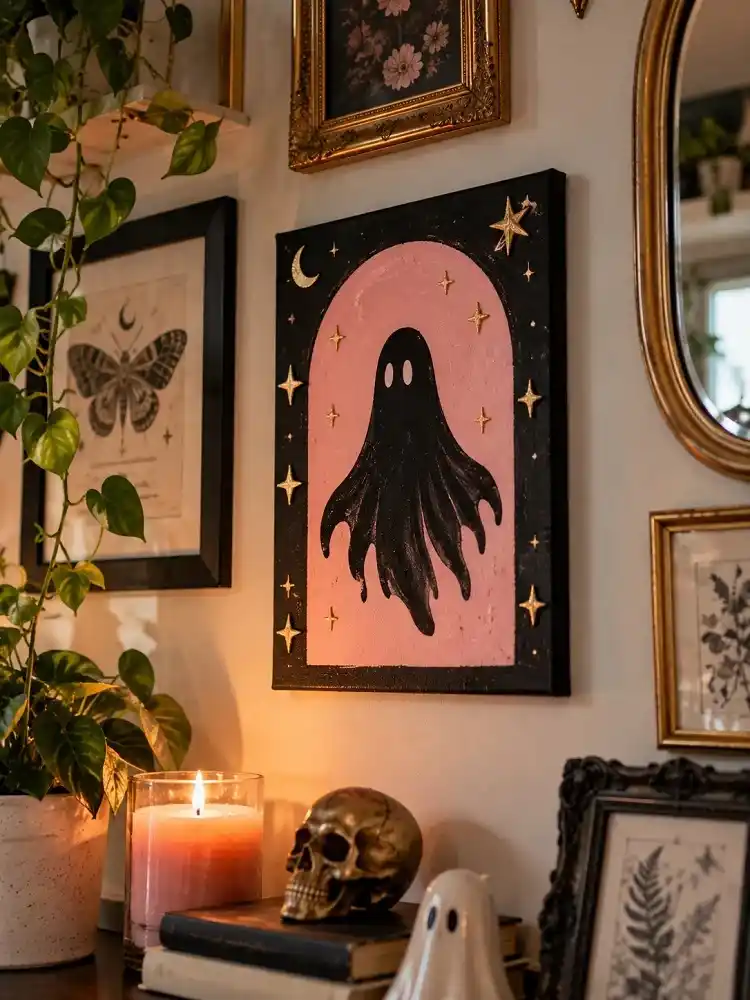
If a room already uses pale or bright colors, you don’t have to switch everything to black for Halloween. A small pastel ghost canvas can bring in the season without fighting the rest of the room.
Paint a soft pink arch on a small blank canvas and let it dry. Add a simple black ghost shape in the center, then finish the border with a few small gold stars or dots.
Place the canvas in an existing gallery wall or lean it on a small picture ledge. Repeating one of its colors elsewhere in the room, such as pink or gold, will help it blend with the decor you already have.
19. Draped Velvet & Floating Battery Pillar Candle Wall
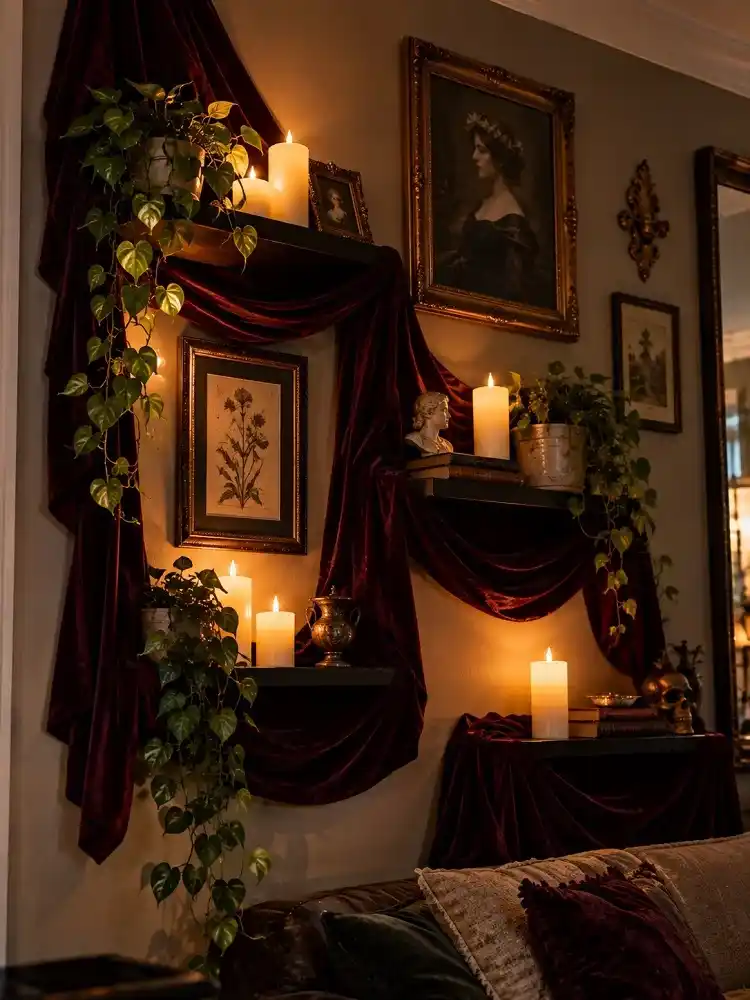
Fabric is an easy way to soften a plain wall and add deeper fall color. Burgundy, deep brown, or black velvet works especially well because the folds catch light and create natural shadows.
Use a piece of fabric wide enough to fall in loose folds rather than pulling it tight across the wall. Drape it from secure pegs or around a small floating shelf, making sure the fabric cannot slide onto anything below it.
Place three or four battery-powered pillar candles on the shelf at different heights. A small stack of books or one framed picture can finish the display without making the shelf feel crowded.
20. Spooky Mirror Selfie & Photo Backdrop Wall
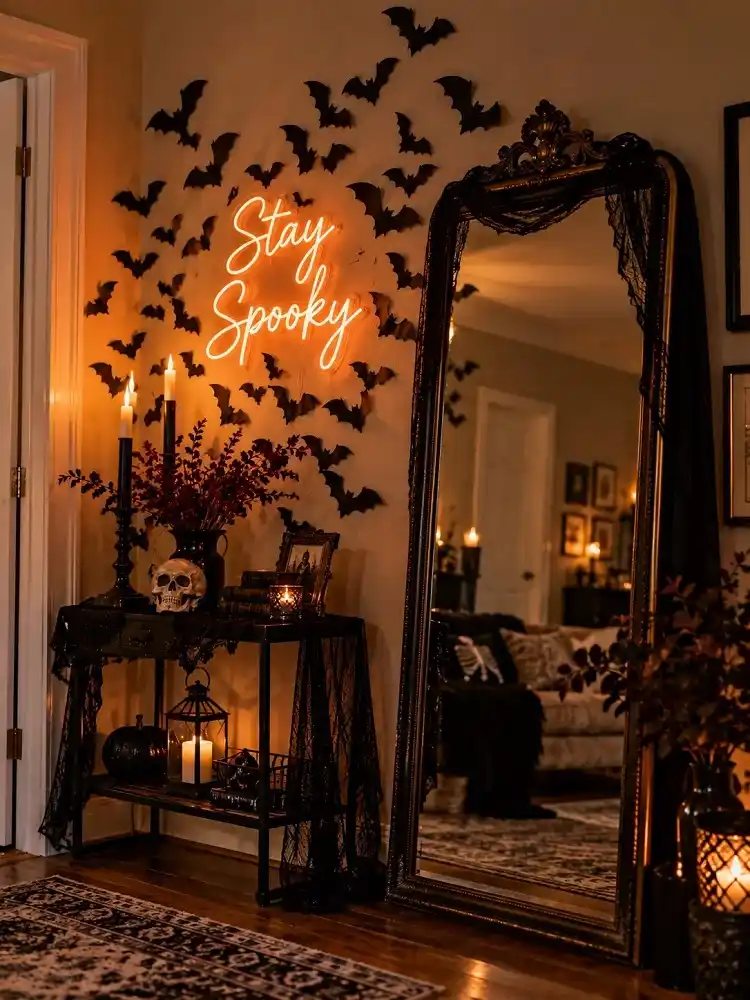
If you’re hosting a Halloween party, a small photo area gives guests a clear place to take pictures of their costumes. You don’t need a full photo booth or a large empty wall to make one.
Place a full-length mirror beside a small LED sign, then arrange a group of black paper bats around the sign and one side of the mirror. Keep the center of the mirror clear so costumes can still be seen from head to toe.
Before the party, stand where guests are likely to take their photos and check the background through your phone camera. Move cords, bags, or other clutter out of the frame. A nearby lamp can also help costumes and faces show more clearly in photos.
Quick Tips for Styling Halloween Walls Safely
A good Halloween wall should look finished without making the room harder to use. These simple rules can help you plan the display before you start hanging decorations.
- Choose a small color palette: Pick two or three main colors, such as black and aged gold or cream and burgundy. Repeating those colors helps different projects feel connected.
- Mix flat and 3D pieces: Paper, prints, and mirror drawings work well beside items that stand away from the wall, such as folded bats or small shelves.
- Start with one focal point: Let one larger piece lead the display. Add smaller decorations around it instead of making every item compete for attention.
- Test removable products first: Tape and adhesive strips can behave differently on fresh paint, old paint, textured walls, wallpaper, and other surfaces. Follow the product directions before decorating a large area.
- Check weight before hanging: Hooks, strips, shelves, and other supports should be suitable for the item they hold. Don’t place hanging decor where a fall could hurt someone.
- Use battery candles near paper and fabric: LED candles are a better choice around dried flowers, books, paper decorations, velvet, and other easy-to-burn materials.
- Leave some empty wall space: You don’t need to fill every open area. A little empty space helps the main decoration stand out.
How to Choose the Right Halloween Wall Decor
If 20 ideas feel like too many choices, start with the room you want to decorate and the amount of work you want to do.
Try mirror ghosts, paper bats, a tape spiderweb, or a small ghost canvas.
Choose the floating broomstick, gothic window, botanical branch, or framed TV.
The mirror photo wall, glowing frames, or bat swarm can create a clear photo area.
Try pressed ferns, velvet, dried roses, or pastel ghost art instead of bright orange decorations.
For most rooms, one main feature plus one or two smaller details is enough. For example, pair the floating broomstick with a small group of bats, or place the velvet candle display beside a few vintage frames. This gives the room a clear theme without making every wall compete for attention.
Final Thoughts
You don’t need to turn the whole room into a Halloween set to make your walls feel seasonal. One strong feature and a few smaller details are often enough.
Start with a decorated mirror, gallery wall, broomstick, or another idea that fits the space you already have. Then add smaller pieces only where the room needs them. Using the same two or three colors across the display will help everything feel connected instead of crowded.
Most of all, choose materials and mounting methods that make sense for your home. A good Halloween wall should be fun to put together, easy to live with, and simple to take down when the season is over.