10 DIY Pallet Ideas That Actually Look Good (And Cost Almost Nothing)
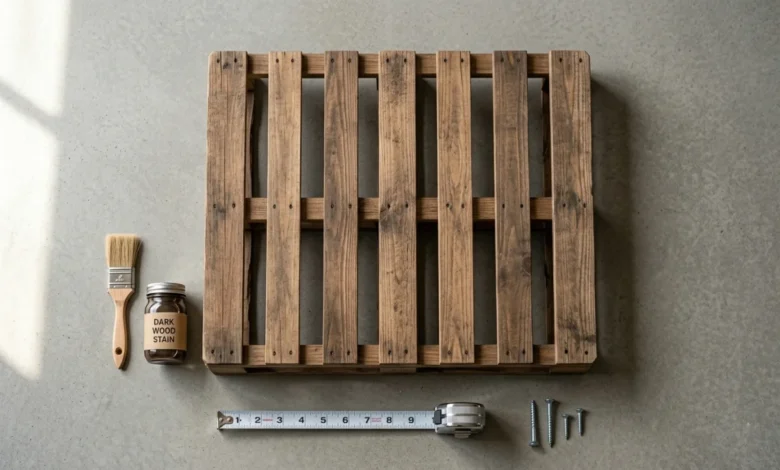
Pallets are one of the most accessible building materials you can get your hands on. Warehouses, hardware stores, and garden centers regularly give them away for free. With basic tools and a weekend afternoon, you can turn a standard 40×48-inch pallet into functional furniture, garden features, or wall decor. These 10 DIY pallet ideas cover indoor and outdoor projects across a range of skill levels, all buildable without a professional workshop or expensive equipment.
Most pallet wood projects cost under $30 to complete when you factor in screws, sandpaper, and stain or paint. A standard pallet coffee table, for example, typically runs between $15 and $25 in supplies, versus $200 or more for a comparable store-bought piece. Whether you want to refresh your living room, organize your entryway, or build raised garden beds, pallets give you a solid material to work with at a fraction of retail cost.
Always Check the Stamp Before You Build
Before you pick up a single pallet, flip it over and look for the IPPC (International Plant Protection Convention) stamp. This stamp tells you how the wood was treated during shipping.
Two codes matter most:
- HT (Heat Treated): Safe for any project, indoors or outdoors.
- MB (Methyl Bromide): Treated with a toxic pesticide. Never use these indoors, near food, or in a garden where you grow edibles.
Pallets stamped “DB” (Debarked) are also safe. If a pallet has no stamp at all, skip it. You cannot determine its history, and the risk is not worth it.
10 DIY Pallet Ideas for Your Home and Garden
1. Pallet Coffee Table
A coffee table is the most popular pallet project for good reason. Stack two pallets on top of each other, sand them down, add four furniture casters to the bottom, and you have a table with built-in lower storage. Paint it white for a modern look or stain it dark walnut for something warmer. Total cost: around $20, including casters and stain.
2. Vertical Pallet Garden
Turn a single upright pallet into a wall-mounted planter. Staple landscape fabric across the back and between the slats, fill with potting soil, and plant herbs, succulents, or trailing flowers into the gaps. Fix it to a fence or exterior wall using two heavy-duty L-brackets. This works especially well in small outdoor spaces where ground planting is not an option.
3. Pallet Headboard
Skip the $300 store-bought headboard. Mount a sanded pallet directly to the wall behind your bed, or attach it to the bed frame using threaded rods. You can leave the wood raw, whitewash it, or add fairy lights across the horizontal slats. For a queen bed, one standard pallet fits the width well. For a king, two pallets side by side do the job.
4. Entryway Console Table
Dismantle a pallet, keep the top boards intact, and build a narrow console table for your hallway. Add hairpin legs from any hardware store (around $25 for a set of four), and you have a mid-century modern entry table that looks anything but DIY. Sand it smooth, apply a clear coat, and it is ready in a day.
5. Pallet Coat Rack
Cut a single pallet board to your preferred length, sand the edges, and attach three to five metal hooks across the face. Mount the board on your entryway wall using two wall anchors. You can stain the wood to match your existing furniture or paint it a contrasting color. This project takes under two hours and solves one of the most common household clutter problems immediately.
6. Outdoor Pallet Sofa
Two pallets placed side by side form the seat base. A third pallet, standing upright and secured with metal brackets, becomes the backrest. Add outdoor foam cushions cut to size (around $40 from a fabric store), and you have an outdoor sofa that would cost $500 or more if purchased new. Seal the wood with exterior-grade polyurethane before assembling to protect it from rain and UV damage.
7. Pallet Wine Rack
Slice individual pallet boards into short lengths, drill two circular cutouts per piece using a hole saw bit, and stack them into a freestanding rack. Each row holds four to six bottles, depending on spacing. Stain the whole piece dark for a bar-style look. This is one of the few pallet projects that genuinely surprises people when you tell them what it is made from.
8. Pallet Bookshelf
Sand a pallet and mount it horizontally on a wall, open side facing out. The gaps between slats work as forward-facing shelves, perfect for displaying children’s books with their covers showing. This style of display increases the chance kids actually pick up a book, since they can see the covers rather than just the spines. Use two short pallet boards fixed vertically on each end as side supports before wall-mounting.
9. Kitchen Wall Shelf
Remove the top boards from one side of a pallet to create a wide open shelf, leaving the frame and bottom boards intact. Sand everything smooth, seal with a food-safe finish, and mount it on your kitchen wall. You get a shelf wide enough for jars, bottles, and a small plant, with the natural character of the pallet wood giving your kitchen a distinct look without a renovation.
10. Pallet Dog Bed
Build a simple raised frame using four short pallet boards, sand all edges until smooth (no splinters near a dog’s skin), and place a washable pet mattress inside. Add a small ramp cut from a spare pallet board if you have a small or older dog. Stencil your dog’s name on the front for a custom finish. Dogs sleep an average of 12 to 14 hours a day, so giving them a proper, raised bed off a cold floor matters more than most people realize.
What Tools You Need Before You Start
Most of these projects require the same small set of tools. If you do not own them already, a basic kit runs about $60 to $80 total.
- Circular saw or jigsaw: For cutting boards to length
- Power drill and bits: For screws, wall anchors, and hole saw attachments
- Orbital sander: 80-grit and 120-grit paper are enough for most projects
- Tape measure and pencil: Accurate measurements prevent wasted wood
- Safety glasses and gloves: Pallet wood splinters more than finished lumber
You do not need a full workshop. A garage or a clear patch of outdoor space works for every project on this list.
FAQs
Where can you get free pallets?
Hardware stores, garden centers, grocery stores, and furniture retailers often have surplus pallets they need to get rid of. Ask at the loading dock, not the front desk. Facebook Marketplace and Craigslist also list free pallets regularly.
How do you clean a pallet before using it?
Brush off loose dirt, then scrub with a stiff brush and a mix of warm water and white vinegar. Let it dry completely in the sun before sanding or painting. For indoor projects, a light bleach solution (one part bleach, ten parts water) kills surface mold that sometimes forms during outdoor storage.
Do you need to seal pallet wood?
For outdoor projects, yes. Use an exterior polyurethane or outdoor wood sealer. For indoor furniture, a clear interior varnish or wax gives the wood protection and brings out its natural grain. Raw, unsealed pallet wood indoors will absorb moisture and eventually warp.
Can you use pallets for a raised garden bed?
Yes, but only HT-stamped pallets. For edible plants, avoid any pallet that shows signs of staining, chemical residue, or unknown treatment history. Line the inside of the bed with heavy-duty landscape fabric before adding soil to create a barrier between the wood and your growing medium.
How long do pallet wood projects last?
Sealed and maintained outdoor pallet furniture typically lasts three to five years before it needs refinishing. Indoor pieces can last decades with basic care. The wood itself is usually pine or hardwood, which is naturally durable when protected from moisture.