Should You Caulk Between Baseboard And Vinyl Floor? (All You Need To Know!)

are you considering installing a vinyl floor in your home? Perhaps you already have one in place, and you’re wondering whether you should caulk the gap between the baseboard and the vinyl floor. Well, you’ve come to the right place! In this blog post, we will dive deep into the topic of caulking between baseboards and vinyl floors and provide you with all the information you need to make an informed decision. So, let’s get started!
Why Caulking Matters
When it comes to home maintenance, attention to detail can make a world of difference. Caulking is an essential part of sealing gaps and preventing moisture, dust, and pests from entering your home. It not only enhances the visual appeal of your baseboards but also helps to maintain a clean and well-maintained living space.
Understanding the Gap
Before deciding whether to caulk between your baseboard and vinyl floor, it’s crucial to understand the purpose and nature of the gap. The gap serves as an expansion joint that allows the vinyl floor to contract and expand with temperature and humidity fluctuations. Without this gap, the floor could buckle or lift, leading to costly repair or replacement.
Pros of Caulking
Caulking the gap between baseboard and vinyl floor has several advantages you should consider. Let’s take a closer look at some of the pros:
1. Aesthetics
Caulking can give your baseboards a finished and polished look. It fills in the gap between the baseboard and the vinyl floor, creating a seamless transition and adding a touch of elegance to your interior.
2. Protection from Moisture
Moisture is the nemesis of many flooring materials, including vinyl. By caulking the gap, you create a barrier that prevents moisture from seeping in and potentially causing damage to both the baseboard and the vinyl floor. This protection is especially crucial in moisture-prone areas such as bathrooms and kitchens.
3. Easy Cleaning
Cleaning the floor is much easier when there are no gaps for dirt, dust, or debris to accumulate. Caulking between the baseboard and the vinyl floor ensures a smooth surface that can be effortlessly cleaned, saving you time and effort in your regular maintenance routine.
4. Pest Prevention
Gaps can become a gateway for unwanted pests, such as insects or rodents, to enter your home. Caulking helps seal off these entry points, reducing the risk of infestation and keeping your living area pest-free.
Cons of Caulking
While caulking between baseboard and vinyl floor may offer numerous benefits, it’s essential to consider the potential drawbacks as well. Here are some cons to keep in mind:
1. Limited Expansion
As mentioned earlier, the gap between the baseboard and the vinyl floor allows for expansion. If you caulk the entire gap, it may restrict the floor’s ability to expand and contract, potentially leading to buckling or warping. It’s crucial to strike the right balance between aesthetics and functionality.
2. Time and Effort
Caulking can be a time-consuming and labor-intensive task, especially if you have a large area to cover. Preparing the surfaces, choosing the right caulk, and ensuring a clean and precise application requires patience and attention to detail.
3. Maintenance
Over time, caulk can deteriorate and crack, requiring maintenance to upkeep its effectiveness. Regular inspection and reapplication may be necessary to ensure the seal remains intact and continues to provide the desired protection and aesthetics.
How to Caulk Between Baseboard and Vinyl Floor
If you’ve weighed the pros and cons and decided that caulking is the right choice for you, let’s walk through the steps to help you achieve a professional-looking result:
- Prepare the area: Clean the gap between the baseboard and the vinyl floor thoroughly, removing any dirt, dust, or debris. Use a putty knife or scraper to scrape away any residual caulk or adhesive.
- Choose the right caulk: Select a high-quality, flexible caulk that is specifically designed for use in flooring applications. Silicone-based or polyurethane-based caulks are often recommended for their durability and ability to withstand movement.
- Cut the caulk tube tip: Cut the tip of the caulk tube at a 45-degree angle to achieve a precise application. The size of the opening should correspond to the width of the gap you’re filling.
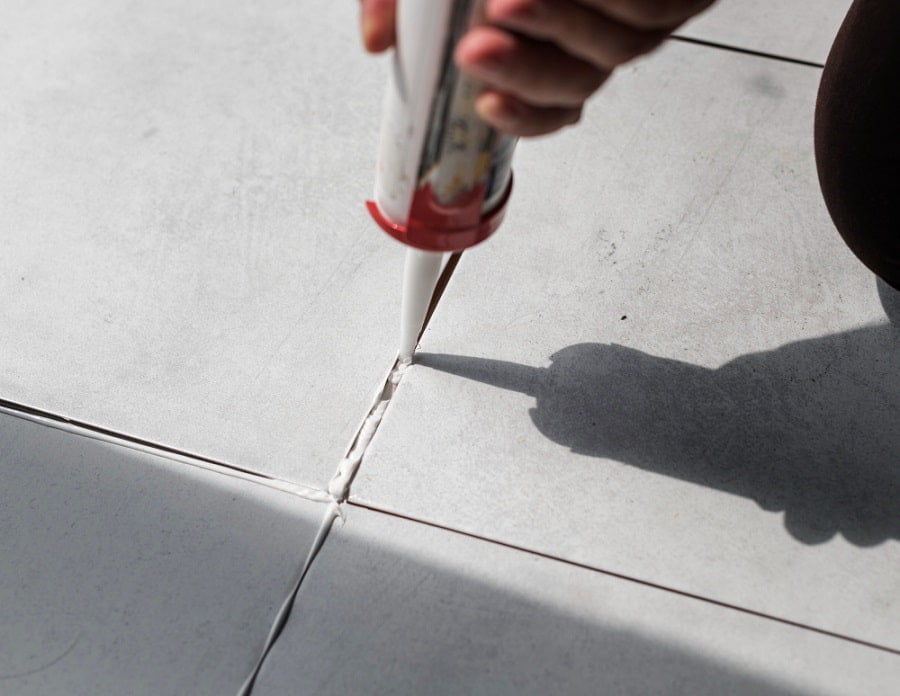
- Apply the caulk: Squeeze a thin, consistent bead of caulk into the gap, ensuring it fills the entire void. A caulk gun can help you control the flow and achieve a smooth application. Consider using a caulk finishing tool or a damp cloth to feather and smooth the caulk for a professional finish.
- Clean up excess caulk: Wipe away any excess caulk using a damp cloth or sponge before it dries. This will help create a clean and neat appearance.
- Allow the caulk to dry: Follow the manufacturer’s instructions regarding drying and curing time. Typically, it takes 24 hours for caulk to fully cure.
When Not to Caulk
While caulking can be a beneficial practice, there are situations where caulking between baseboard and vinyl floor may not be necessary or advisable. Here are a few scenarios to consider:
- Floating Floor Installation: If you have a floating vinyl floor, it’s typically not recommended to caulk between the baseboard and the floor. Floating floors require the freedom to move to accommodate environmental changes, and caulking may hinder this movement.
- Expansion Gaps: If your vinyl floor installation instructions specify the need for a minimal expansion gap, it’s important to follow these guidelines. Avoid caulking in areas where the gap is essential to allow for the floor’s expansion and contraction.
- Structural Movements: In some cases, buildings may experience slight movements due to settling or other factors. If you suspect significant structural movements in your home, caulking may not be a suitable solution as it can interfere with the natural shifting of the baseboard and floor.
Conclusion
To caulk or not to caulk? That is the question. Ultimately, the decision to caulk between the baseboard and vinyl floor depends on various factors, such as aesthetic preferences, moisture concerns, and the type of flooring installation. Weighing the pros and cons, you can make an informed choice that aligns with your needs and goals.
Remember to consider the impact on expansion, allocate sufficient time and effort for the task, and stay consistent with maintenance to ensure the longevity of the caulk seal. By taking these factors into account and carefully following the recommended steps, you’ll be well on your way to achieving a beautiful, functional, and well-maintained home!
Now that you’re armed with essential knowledge about caulking between baseboard and vinyl floor, why not tackle the project and transform your living space? Happy caulking!


