Getting Rid of Yellow Stains on Your Toilet Seat for Good

We’ve all been there – you enter the bathroom, lift the toilet seat, and cringe at the sight of those yellowish stains. While a natural reaction, yellow stains can make your bathroom seem unclean and neglected. The good news? With some elbow grease and the right techniques, you can banish stubborn yellow stains from your toilet seat.
This article will cover the common causes of yellowing, explain the difference between routine and deep cleaning, provide a step-by-step guide for removing stains, suggest natural cleaning solutions, highlight preventative measures, advise when to replace the seat altogether, and more. Arm yourself with these toilet cleaning secrets for a pristine and inviting bathroom.
Introduction
Yellow stains on a toilet seat can occur for a variety of reasons – hard water minerals, urine residue, bacteria buildup, and general lack of cleaning being some of the most common culprits. If left untreated over time, these stains can become stubborn and seemingly impossible to remove.
However, keeping on top of your bathroom’s cleanliness is important for both aesthetics and hygiene. So before reaching for a new toilet seat, try these cleaning methods using common household products. With some scrubbing and soaking, you can erase tough stains without resorting to harsh chemicals.
This article will explore the causes of yellowing, teach you how to clean and disinfect, provide natural cleaning solutions, offer prevention tips, discuss when replacement is needed, and generally level up your toilet cleaning game. The goal? To send those nasty yellow stains packing for good.
Understanding Yellow Stains
Not all yellow stains are created equal. Understanding the type of stain you’re dealing with will inform the best way to remove it. Here are some of the most common causes of yellowing on a toilet seat:
Hard Water Stains
Hard water contains a high concentration of minerals like calcium and magnesium. When water evaporates, it leaves behind mineral deposits on surfaces. Over time, these deposits can cause yellowish or brown staining.
Hard water stains often present as a thin, shiny layer coating the toilet seat. They may be tricky to remove depending on how long they’ve had to set.
Urine Stains
Urine contains urea, uric acid, salts, bacteria, and pigments that can stain surfaces over time. Stains often occur around the top of the bowl or underside of the seat.
When fresh, urine stains tend to be yellowish. If left for longer, they oxidize and turn reddish-orange. The bacteria in urine can also contribute to grayish buildup.
Bacteria and Biofilm
Toilet seats provide the perfect warm, moist environment for bacteria to thrive. Over time, bacteria accumulate and generate biofilm – a slimy substance coating the surface.
Biofilm allows disease-causing germs to adhere and rapidly multiply. It appears as a yellowish, murky film that allows stains to take hold.
The takeaway? Yellow stains indicate mineral deposits, urine residue, and bacterial growth – all of which need tackling through thorough cleaning methods.
Regular Cleaning vs. Deep Cleaning
Before detailing stain removal techniques, it’s important to understand the difference between regular cleaning and periodic deep cleaning.
Regular Cleaning
- Light surface cleaning to remove recent stains and bacteria
- Quick wipe-downs using multi-surface spray or mild cleanser
- Done frequently – daily to weekly
- Prevents buildup of stubborn stains
Deep Cleaning
- Thorough cleaning targeting engrained stains
- Uses abrasives, acids, bleaches, and disinfectants
- Done monthly or each season
- Removes existing stains and biofilm
Regular cleaning is essential for preventing the onset of stubborn staining. However, periodic deep cleaning is equally important for eliminating stains over time, disinfecting surfaces, and resetting the cleanliness baseline.
With this distinction in mind, let’s explore hands-on techniques for eradicating yellow stains.
Step-By-Step Guide to Removing Yellow Stains
When confronting long-standing yellow stains, roll up your sleeves and put some elbow grease into these cleaning steps:
1. Assess Stain Type
Examine the stains up close. Are they thin and shiny, indicating mineral deposits? Or do they seem murky and embedded? This will inform the type of cleaning solution needed.
2. Choose Cleaner and Gather Supplies
For light stains, an all-purpose bathroom cleaner or baking soda paste often does the trick. For stubborn yellowing, break out the big guns like bleach, vinegar, oxygen boosters, or commercial stain removers.
Assemble all necessary supplies – cleaners, scrub brushes, scouring pads, towels, gloves, and eye protection.
“Always err on the side of caution and wear gloves when handling harsh cleaning chemicals.”
3. Prepare the Bathroom
Thoroughly cleaning a toilet seat can get messy. Clear countertops, protect flooring with towels, open windows for ventilation, and tie-back shower curtains.
Cover the toilet bowl opening with a towel to prevent chemical dripping. Or for easier access, detach the seat altogether according to manufacturer instructions.
4. Apply Cleaner
If using a commercial cleaner, first check the label instructions. For DIY solutions, apply your chosen cleaning paste or liquid directly to stained areas.
Work the cleaner into the stains using a scrub brush or scouring sponge. Let it soak for 5-10 minutes.
5. Scrub and Wipe Away
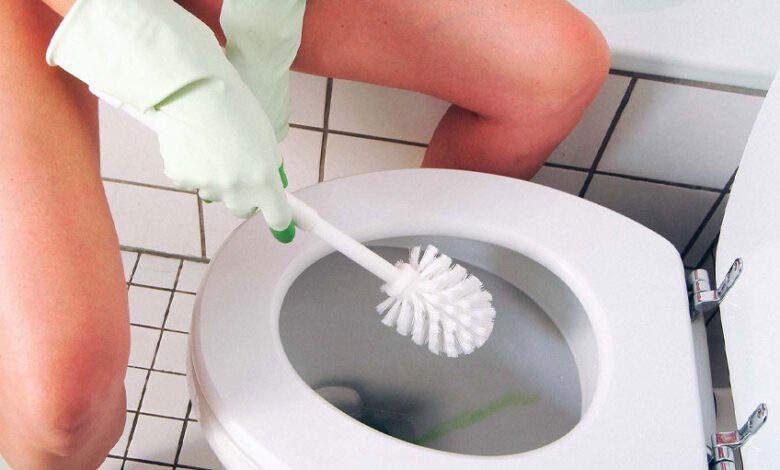
Here comes the elbow grease! Scrub those stains away using a brush or abrasive sponge. Apply pressure and scrub in a circular motion.
Once the cleaner has done its job, wipe down the seat thoroughly with clean water to rinse. Use a mild detergent if needed to remove any lingering residue.
6. Inspect and Repeat if Needed
Examine the seat closely under good lighting. Do some faint stains remain? Repeat steps 3-5, allowing more soaking time for stubborn residue.
For tough mineral stains, a second vinegar application often does the trick. But avoiding chemical overuse to prevent damage.
7. Disinfect and Freshen Up
After cleaning, disinfect the toilet seat using EPA-registered bathroom disinfectants or a 70% isopropyl alcohol solution. This kills any remaining germs.
Finally, a rinse with lemon essential oil leaves a fresh, clean scent behind. Sprinkle baking soda directly on the seat if any odors linger after deep cleaning.
And just like that – free from nasty yellow stains for good! But remember, these steps only work through diligence and repeat applications. Don’t let stains return – incorporate these techniques into your regular toilet cleaning routine.
“A clean bathroom reflects a healthy home.” – Marie Kondo
Natural Solutions for Tough Stains
For those wanting to avoid harsh chemicals, several DIY cleaning solutions harness the power of nature to dissolve yellow stains:
White Vinegar
Vinegar’s high acidity breaks down mineral deposits, urine residue, and biofilm buildup. For light stains, use undiluted white vinegar. For tougher jobs, mix equal parts vinegar and hot water.
Spray vinegar directly on stained areas. Let soak for 5-10 minutes before scrubbing and wiping clean. Repeat as needed.
Baking Soda
Baking soda is a gentle abrasive that lifts stains through mechanical scrubbing. It also neutralizes odors.
Make a paste by mixing 3 parts baking soda to 1 part water. Scrub paste onto stained surfaces and let sit briefly before rinsing. Baking soda can be used alone or to boost other natural solutions.
Lemon Juice
Like vinegar, lemon juice contains acidic compounds perfect for dissolving mineral deposits and biological materials.
Squeeze lemon juice directly onto toilet seat stains. Let sit for 5 minutes. Scrub with a stiff brush and rinse clean.
Hydrogen Peroxide
The bubbling reaction of hydrogen peroxide lifts residue while bleaching stains. Use a 3% concentration of hydrogen peroxide.
Apply peroxide directly and let react for 10 minutes before scrubbing away stains. Rinse thoroughly.
Caution: Avoid getting cleaning solutions inside the toilet bowl to prevent bathroom plumbing issues.
Remember: Natural solutions often require more scrubbing effort but avoid harsh chemicals. For best results, allow cleaners to fully penetrate stains by letting them soak before scrubbing.
The Role of Preventative Measures
The easiest way to keep a toilet seat stain-free? Never let stains develop in the first place through these preventative measures:
- Perform quick cleaning after every use
- Wipe the seat and underside rim with toilet paper
- Use toilet wipes for easy cleaning
- Schedule weekly light scrubbing
- Use a soft brush and mild bathroom cleaner
- Target crevices and high-touch areas
- Install toilet seat bumpers
- Protect the seat by closing it slowly
- Avoid impact cracks that catch stains
- Deep clean monthly
- Target embedded mineral and biofilm buildup
- Disinfect fully with bleach cleanser
- Address hard water issues
- Install water-softening systems
- Use mineral-binding cleaners regularly
Putting in work on the front end dramatically cuts down on heavy-duty cleaning later on. Making these cleaning and maintenance practices routine will help banish yellow stains from your bathroom.
When to Consider Replacement
However, some stains become too engrained in aged toilet seats, requiring replacement. Here are signs it’s time to swap out your existing seat:
- Stains persist despite repeated cleaning attempts
- Porous, plasticized surface catches stains easily
- Cracks or imperfections trap residue
- Mineral deposits indicate hard water damage
- Bowed shape and loose fit cause rocking
When replacing the toilet seat, consider upgrade options with stain-resistant construction:
- Antimicrobial plastic composition
- Elongated shape for less splashing
- Soft-close hinges prevent slamming
- Tight seal with toilet bowl
- Smooth, easy-to-clean finish
Investing in a higher-end, ergonomic toilet seat makes cleaning easier while preventing future staining.
Table 1. Comparison of Cleaning Agents
| Cleaning Agent | Effectiveness | Safety | Cost |
|---|---|---|---|
| White Vinegar | Highly effective at dissolving mineral and urine stains | High-safety, non-toxic | Low cost from the grocery store |
| Baking Soda | Moderately effective through abrasive scrubbing | Very safe, non-toxic | Low cost as a kitchen staple |
| Lemon Juice | Effective enzyme cleaner for organic stains | Safe, minor skin irritation risk | Low cost as a household item |
| Hydrogen Peroxide | Highly effective stain bleacher | Moderate safety causes skin/eye irritation | Low cost for small quantities |
| Commercial Cleaners | Highly effective, designed for bathroom staining | Risk of toxicity, skin/eye damage | Moderate cost from grocery store |
Incorporating Professional Cleaning Services
For some homeowners, the chore of tackling toilet stains proves too large for regular maintenance. In these cases, consider hiring professional bathroom cleaning services.
Pro cleaners have high-grade equipment, commercial chemicals, and the manpower to thoroughly descale and disinfect your bathroom. They can eradicate years of staining in one session.
Consider hiring bathroom cleaning pros:
- After moving into a new home
- When stains overwhelm DIY efforts
- As a seasonal deep-cleaning splash
- Before listing a home for sale
- For routine maintenance if cost allows
Though an added expense, professional toilet cleaning services guarantee sparkling results while freeing up your precious time.
Conclusion
Toilet seats inevitably confront grime, minerals, bacteria, and bodily waste that can leave unsightly yellow stains over time. However, arming yourself with the right stain removal techniques means you can win the war on toilet yellowing.
Remember to assess the stain type, use cleaning agents formulated to target the specific residue, and apply some determination through scrubbing. Prevent future stains through regular light cleaning and disinfecting. For tough mineral buildup or permanent staining, replacing worn toilet seats proves the wise solution.
Follow these toilet cleaning guides and suggestions to keep your bathroom fresh, clean, and free of embarrassing yellow stains for years to come. After all, few things feel better than entering a pristine bathroom free of unsightly stains or grime. Just remember – defeating stubborn toilet stains requires equal stubbornness on your part.


